Setting up the BuckStik is a very simple process, but there are a few key procedures that will greatly increase your success whether you are looking to capture trail camera photos or pull deer into an area that you’re hunting.
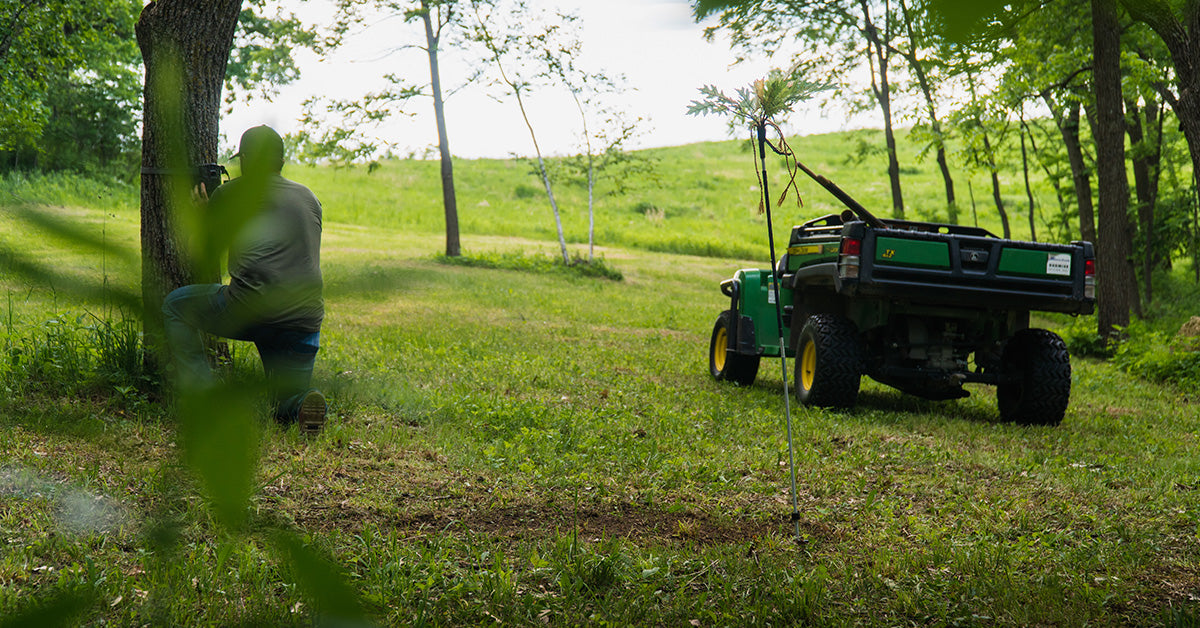
Lets first discuss location. The BuckStik is going to excel in high deer traffic areas. Places like tree lines, fence lines, food plots, staging areas, or trail intersections. If it’s an area you would set a treestand to intercept likely deer travel, it’s going to be a great location for the BuckStik. As hunters, nearly all of us have “Honey Holes” on the private or public lands we’ve hunted over the years. These areas have continuously produced great trail camera photos or hunting results year after year. This is the type of spot the BuckStik can pull deer to like you’ve never seen before.
Typically, there are two trains of thought when using a BuckStik. The first is with the goal of drawing deer to the BuckStik to collect trail camera photos. This can of course be done before, during or after the hunting season. Many times, especially during the offseason, you can be a bit more aggressive with this strategy by pushing closer to bedding areas and other sanctuaries for setup. The second common use for the BuckStik is to place it near a treestand with the intention of pulling deer within range of your weapon of choice. The location and setup process rarely differ between the two tactics other than when you’re looking to hunt over the BuckStik and exact location for an ethical shot should be well thought out.
BuckStik Instructions (In Season Application):
We suggest all assembly be done in the field. (Use Disposable Gloves if possible)
- Assemble the two halves at the metal ferrule.
- With your foot, push post into the ground using the easy step-in, until flush with the ground.
- Arrange top leaf assembly, by spreading the leaves out.
- Bend vine arched and facing downward.
- Apply each gland by using the gland diagram below:
- Pre-Orbital #1 Gland applies to top leaf assemble and interactive vine. 2 Sprays total.
- Forehead #2 Gland applies directly to the middle interactive forehead strip. 1 spray
- Interdigital Gland #3 applies to the bottom scent pad and surrounding ground. 1-2 sprays.
- Refresh the BuckStik every 3-4 weeks. If you notice the deer keep coming back at 3 or 4 weeks you can wait longer. Every 5-6 weeks before refresh in that case. (Less is more, Do not over spray)
- Purchase the Pine or Cedar Resin add on? Apply generously to forehead strip.

Once your BuckStik is setup, Create a Mock Scrape by scaping the ground away under the BuckStik in roughly a 3x3 foot area (a garden rake works well).

Next it is time to apply BuckStiks #1, #2 and #3 Glands. The #1 Gland or preorbital gland should be applied to the leaves, rope, and vines at the top of the BuckStik. Bucks rub their preorbital on branches and twigs above scrapes or rubs. This gland serves identification and calling-card purposes. The #2 Gland or the forehead gland should be applied to the mesh forehead strip, located just below the leaves. When a buck rubs its antlers and forehead glands on shrubs, trees, fence posts or anything else, it is embedding its signature. Lastly, the #3 Gland or the interdigital gland should be sprayed at the base of the BuckStik or in the mock scrape itself. The interdigital gland is a deer’s calling card. Odor is left in the deer’s track, whether a buck or doe. Remember, very little gland spray is needed. One to two pumps of the spray is enough for 3-4 weeks.
This entire setup process is ideally done well in-advance of your hunt or scouting season and should be executed with rubber gloves and a concern for scent control. Like many other deer hunting practices such as trail camera setup or treestand work, the less intrusive you can be while in the deer woods is always best. Once these tasks are complete your BuckStik will quickly begin to draw deer to its area. You should strive to refresh each gland scent every few weeks, especially during the prime periods of the fall. The BuckStik is extremely durable and can be left year-round, continually attracting deer to your property.
Territorial Application:
The most active, and exciting way to use BuckStik…. And our favorite time of year…the RUT!
Pre-rut, active rut, post rut….it doesn’t matter. This is when bucks are the most territorial. When you put out a BuckStik this time of year, you are telling bucks in the area “THERE IS A NEW BUCK IN TOWN!” This is when it gets intense and exciting!
One of the best ways to use the BuckStik during any stage of the rut is to place it about 20-25 yards from your stand. Once it’s in the ground, make a mock scrape right in front of the BuckStik. This is when we suggest using BuckStik #4 Pure Tarsal Gland (Sold Separately) on/near the mock scrape. BuckStik #4 introduces a highly concentrated 4th gland (90% tarsal/10% High testosterone urine). Aggressive grunts and rattling will produce high results as the dominant bucks are now looking for the “new guy”.

Off Season Application:
The off season is all about maintaining communication and herd inventory. We have found bucks, does and even fawns interact and communicate with the BuckStik all year long. Rain, snow, or sunshine deer continuously interact with the BuckStik.
During the off season (Late Feb-July). BuckStik works great by itself. Place the BuckStik anywhere deer congregate such as feeding areas, fields, funnel crossings etc..
During Offseason do not use #2 or #3 Spray on the BuckStik. Only use #1 Preorbital spray on the BuckStik’s leaves and vine. Spray once every 3-4 weeks during the off season.
Just ask BuckStik user Edward R. if the Buckstik works well under Harsh conditions. Edward's Trail cam picture shows the dual action of the Forehead and Preorbital gland being worked simultaneously. Thanks Edward for the Pic!
